This is a gest post from Vytas Narusevicius originally posted in his blog Superinfocus.com.
From Medium Format Digital to Micro 4/3
There has been a great deal of hoopla created by the announcement of two new medium format mirrorless cameras from Fuji and Hasselblad. Having shot medium and large format film for some time, I too was excited at the prospect of medium format digital in a compact format and at a more reasonable price than the traditional Phase One or Hasselblad offerings. My previous foray into digital was primarily with Sony A7 series cameras that allowed me to use my existing collection of film era lenses as well as some of the new Sony/Zeiss lenses. I hesitated to upgrade my A7r because of the expense of moving to a A7r II and how physically large and expensive the new Sony lenses had become. For a change of pace I decided to dip my toe into micro 4/3s with the modestly priced Panasonic GX85 that came with a compact 12-35mm lens. The quality of the images from that camera really surprised me and I quickly added a Panasonic Leica Summilux 15mm 1.7 and 25mm 1.4. It was a revelation that in some cases there was very little difference between the images taken on the GX85 versus the A7r. Of course if you pixel peeped, you could see more resolution at 100% on the A7r, but the quality of especially the Summilux lenses was equal to the Sony/Zeiss lenses. The major difference, as far as I could tell, was only how large you could print, but more on this later. The GX85 became my preferred walking around camera, and the Sony A7r was relegated to more serious landscape work. However, with the announcement of the new mirrorless medium format cameras I started to think about getting the look that I loved in medium and large format film that was still missing from my 35mm digital experience.
Since I had a film Pentax 645N film camera with some very nice 645 lenses, it dawned on me that I could try out digital medium format in a relatively economical manner. I purchased a Pentax 645D and although it was 5 years old and came with a 40MB CCD sensor, many Pentaxians claimed there was very little resolution difference between it and the newer Pentax 645Z’s 50MB CMOS sensor (the same one that the new Fuji and Hasselblad are using). Additionally there was talk about how the CCD sensor produced better color than the new CMOS sensor. The real big difference between the 645D and Z is better high ISO performance with the Z. But buying a 645D seemed like a good idea since I was going to use it mainly for landscape photos on a tripod, thus high ISO was not an issue and I already owned some highly rated Pentax lenses such as the SMC-A 645 35mm, an A 75mm, and an A 120mm lens. The results I got from the 645D were great, definitely better than the A7r in terms of resolution, color and a more subtle graduated tonality. Nevertheless, while I was in a forest shooting one of my favourite trees, I decided to do a little experiment as I had both my Pentax 645D with a 35mm lens as well as my GX85 with the 15mm Summilux, each having a roughly similar 28mm focal length in 35mm terms. I took some images with each camera using a tripod from the same spot and compared them in Photoshop. To my great surprise, I again did not really see that much of a difference, obviously as one would expect, the 645D image had far more resolution if you pixel-peeped at 100%. However, as you can see below there is little visible difference between the digital images, especially at Internet resolution. Oddly, the GX85 appeared to have more of a 3 dimensional appearance than the 645D image.
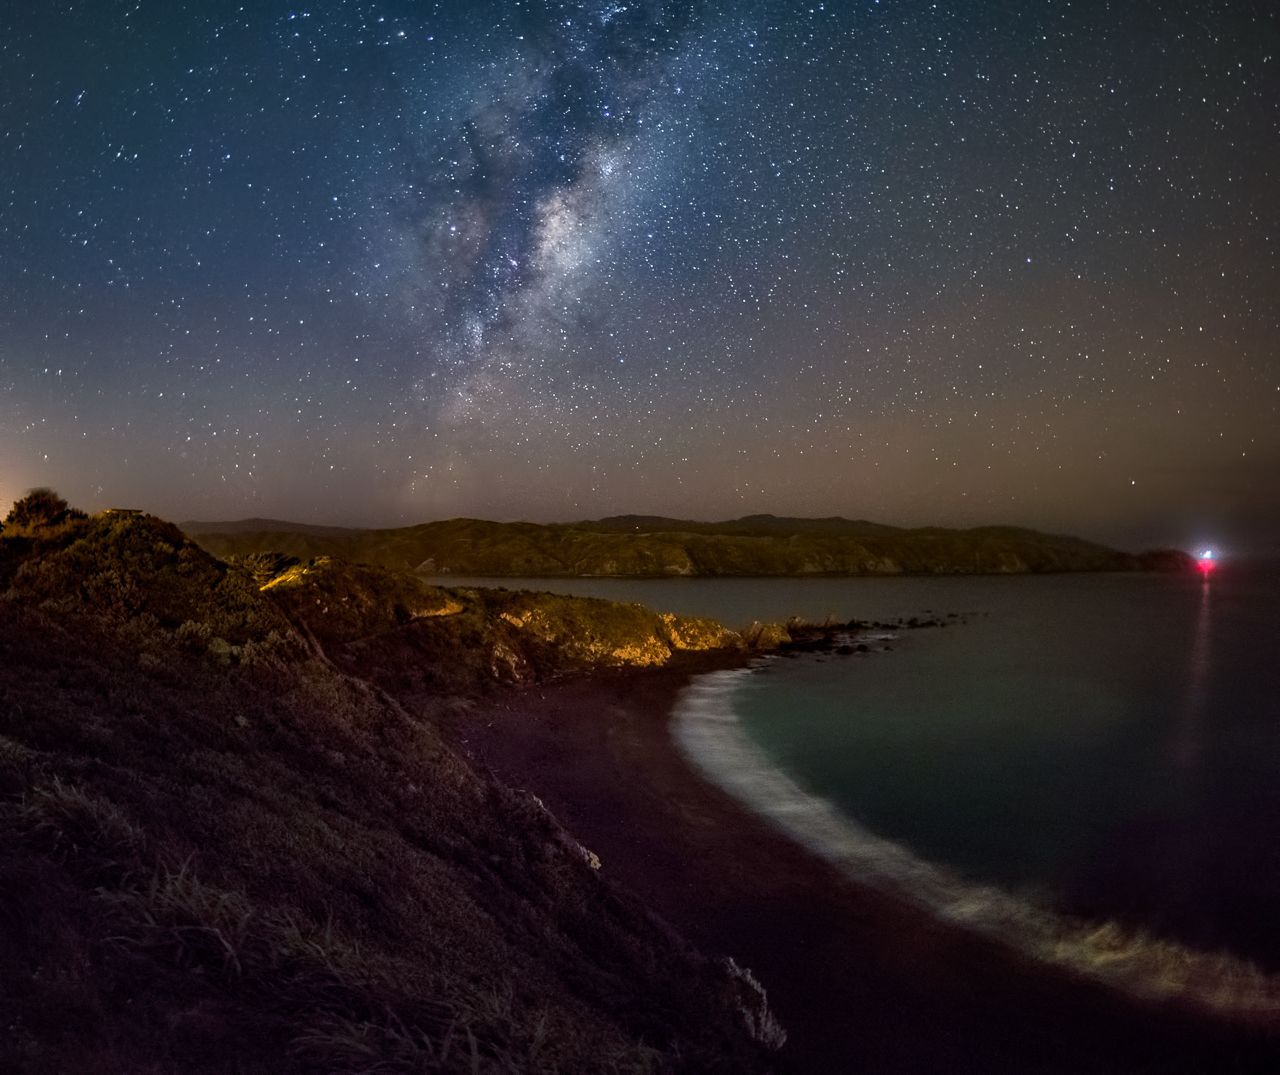
Pentax 645D, Pentax SMC-A 645 35mm, ISO 200, f16 and 2 seconds:

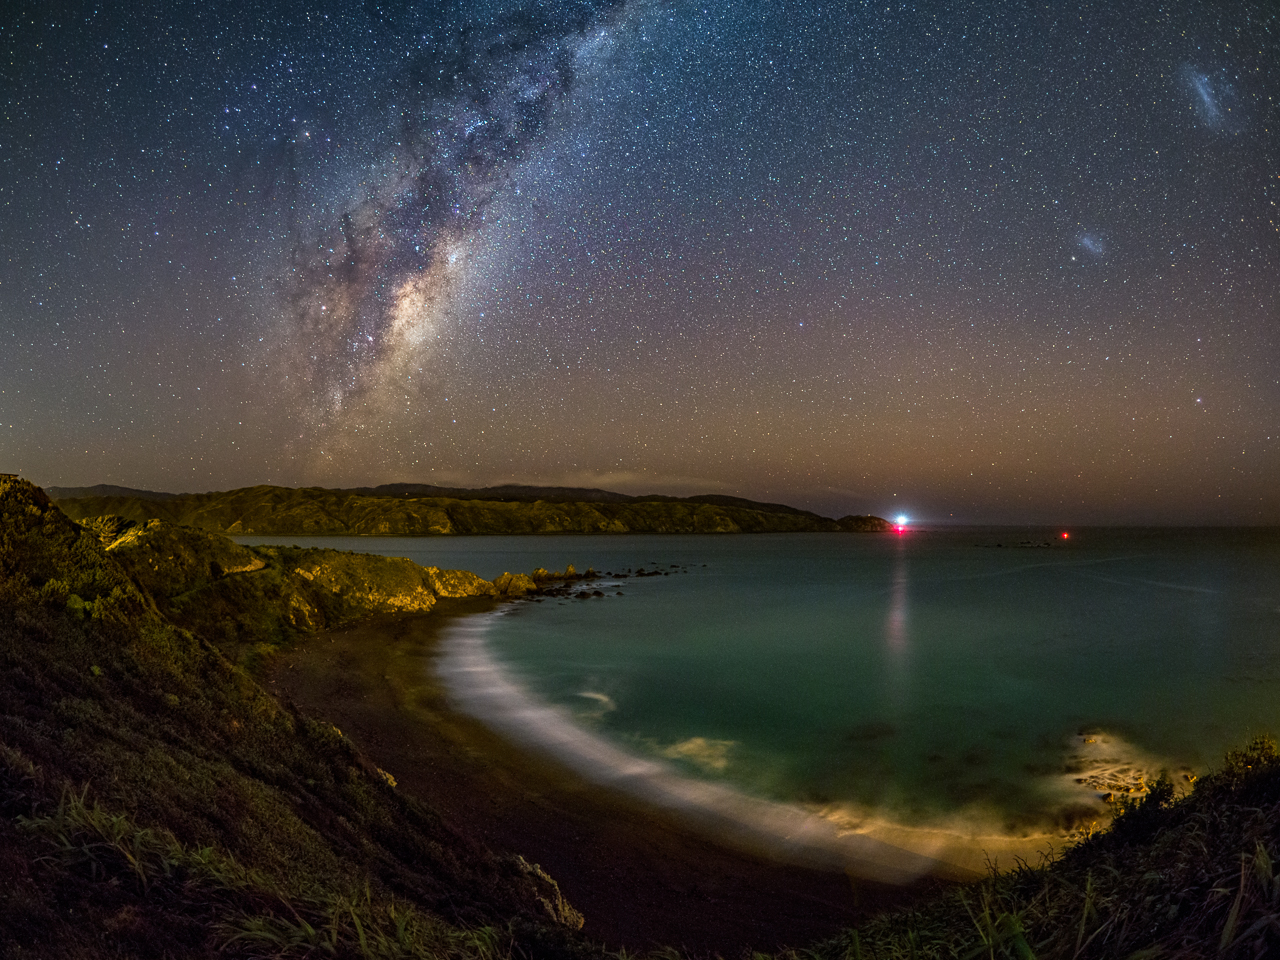
Panasonic GX85, Panasonic Leica Summilux 15mm f/1.7, ISO 200, f5.6 and 1/6 of a second:
 Next I decided to do a print comparison because the real test, in my opinion, is how things look in print. My go-to paper is Canson Baryta and since that largest size that I can print on my Epson P800 is 17” x 22,” I printed the images with a small border at 16” x 20” each. Looking at the printed images was more surprising to me than looking at them on the computer as there was even a less discernable difference. Below are some close ups of the prints taken with a 120mm macro lens on the 645D. It is roughly the equivalent of having your eyeball about one inch away from the print, an unrealistic real life situation and a distance at which I certainly cannot focus my eyes. As you can see, the 645D print is a bit better at this close range than the GX85. But at a more comfortable viewing distance, as close as one foot, there is no discernable difference between the two. When I used to wet print, even in a small 8×10 print, I was almost always able to see the difference between a 35mm print and a medium format print. The fact that a M4/3’s print at a fairly good size of 16” x 20” can stand up to a medium format digital print is a testament to the quality of the M4/3 sensor of the GX85 with a PanLeica Summilux 15mm lens.
 Given the largest print size that I can produce on the printer that I own, and the fact that there is such little difference between the prints, I really don’t see the point of the extra expense and weight. I haven’t mentioned the other advantages of the GX85 such as sensor stabilization, a smaller sensor that gives more depth of field for landscapes, and lets not forget eye sensing technology that helped produce my perfect Christmas portraits, as well as 4K video to top things off. The cameras and lenses available for micro 4/3s are so outstanding, that unless you are printing really big, there is little or no reason to go to APC or full frame, let alone medium format. There are many professionals fine art photographers that print in sizes less than 17” x 22” so it is not as much of a limitation as it is may seem. If money were not an object, then I too would love to have one of the new Fuji or Hasselblad cameras. But since that is not the case, it is important think about the end product that one is actually producing, which is usually a print of a particular size, and what is the best way for one to effectively and creatively produce it.