
Matching four Micro43 cameras and a Sony A7s for a live shoot of a 7’-tall singing clown (by Gary Yost)

Hallelujah – Puddles Pity Party at the SF Regency Lodge Ballroom
—–
The following article is a guest post from Gary Yost. If you want to write on 43rumors contact me at 43rumors@gmail.com. Thanks!
—–
Matching four Micro43 cameras and a Sony A7s for a live shoot of a 7’-tall singing clown.
Due to different project requirements, I’ve collected a variety of camera bodies over the years. Nikon DSLRs, a Black Magic Pocket Cinema Camera, Panasonic GH4 (and GX7) and the Sony A7s. Each has its own strengths (and weaknesses). When I began production on a new video for a 7’ tall singing clown named Puddles at a recent live show in San Francisco, I decided to use four Micro 43 cameras and the Sony A7s to capture a 5-camera multicam recording for Puddles’ cover of Leonard Cohen’s legendary song “Hallelujah.” (The fifth camera was a borrowed GH4 belonging to my friend Mark Spencer, giving us two GH4s for shooting in 4K, providing the ability to punch into those shots in post.) I recently had a great experience shooting a 4K trailer for the Mill Valley Film Festival with the GH4, but I also wanted to put the A7s to the test, especially in the dressing room of the theater where I’d be very close to the subject, sometimes in fairly low light.
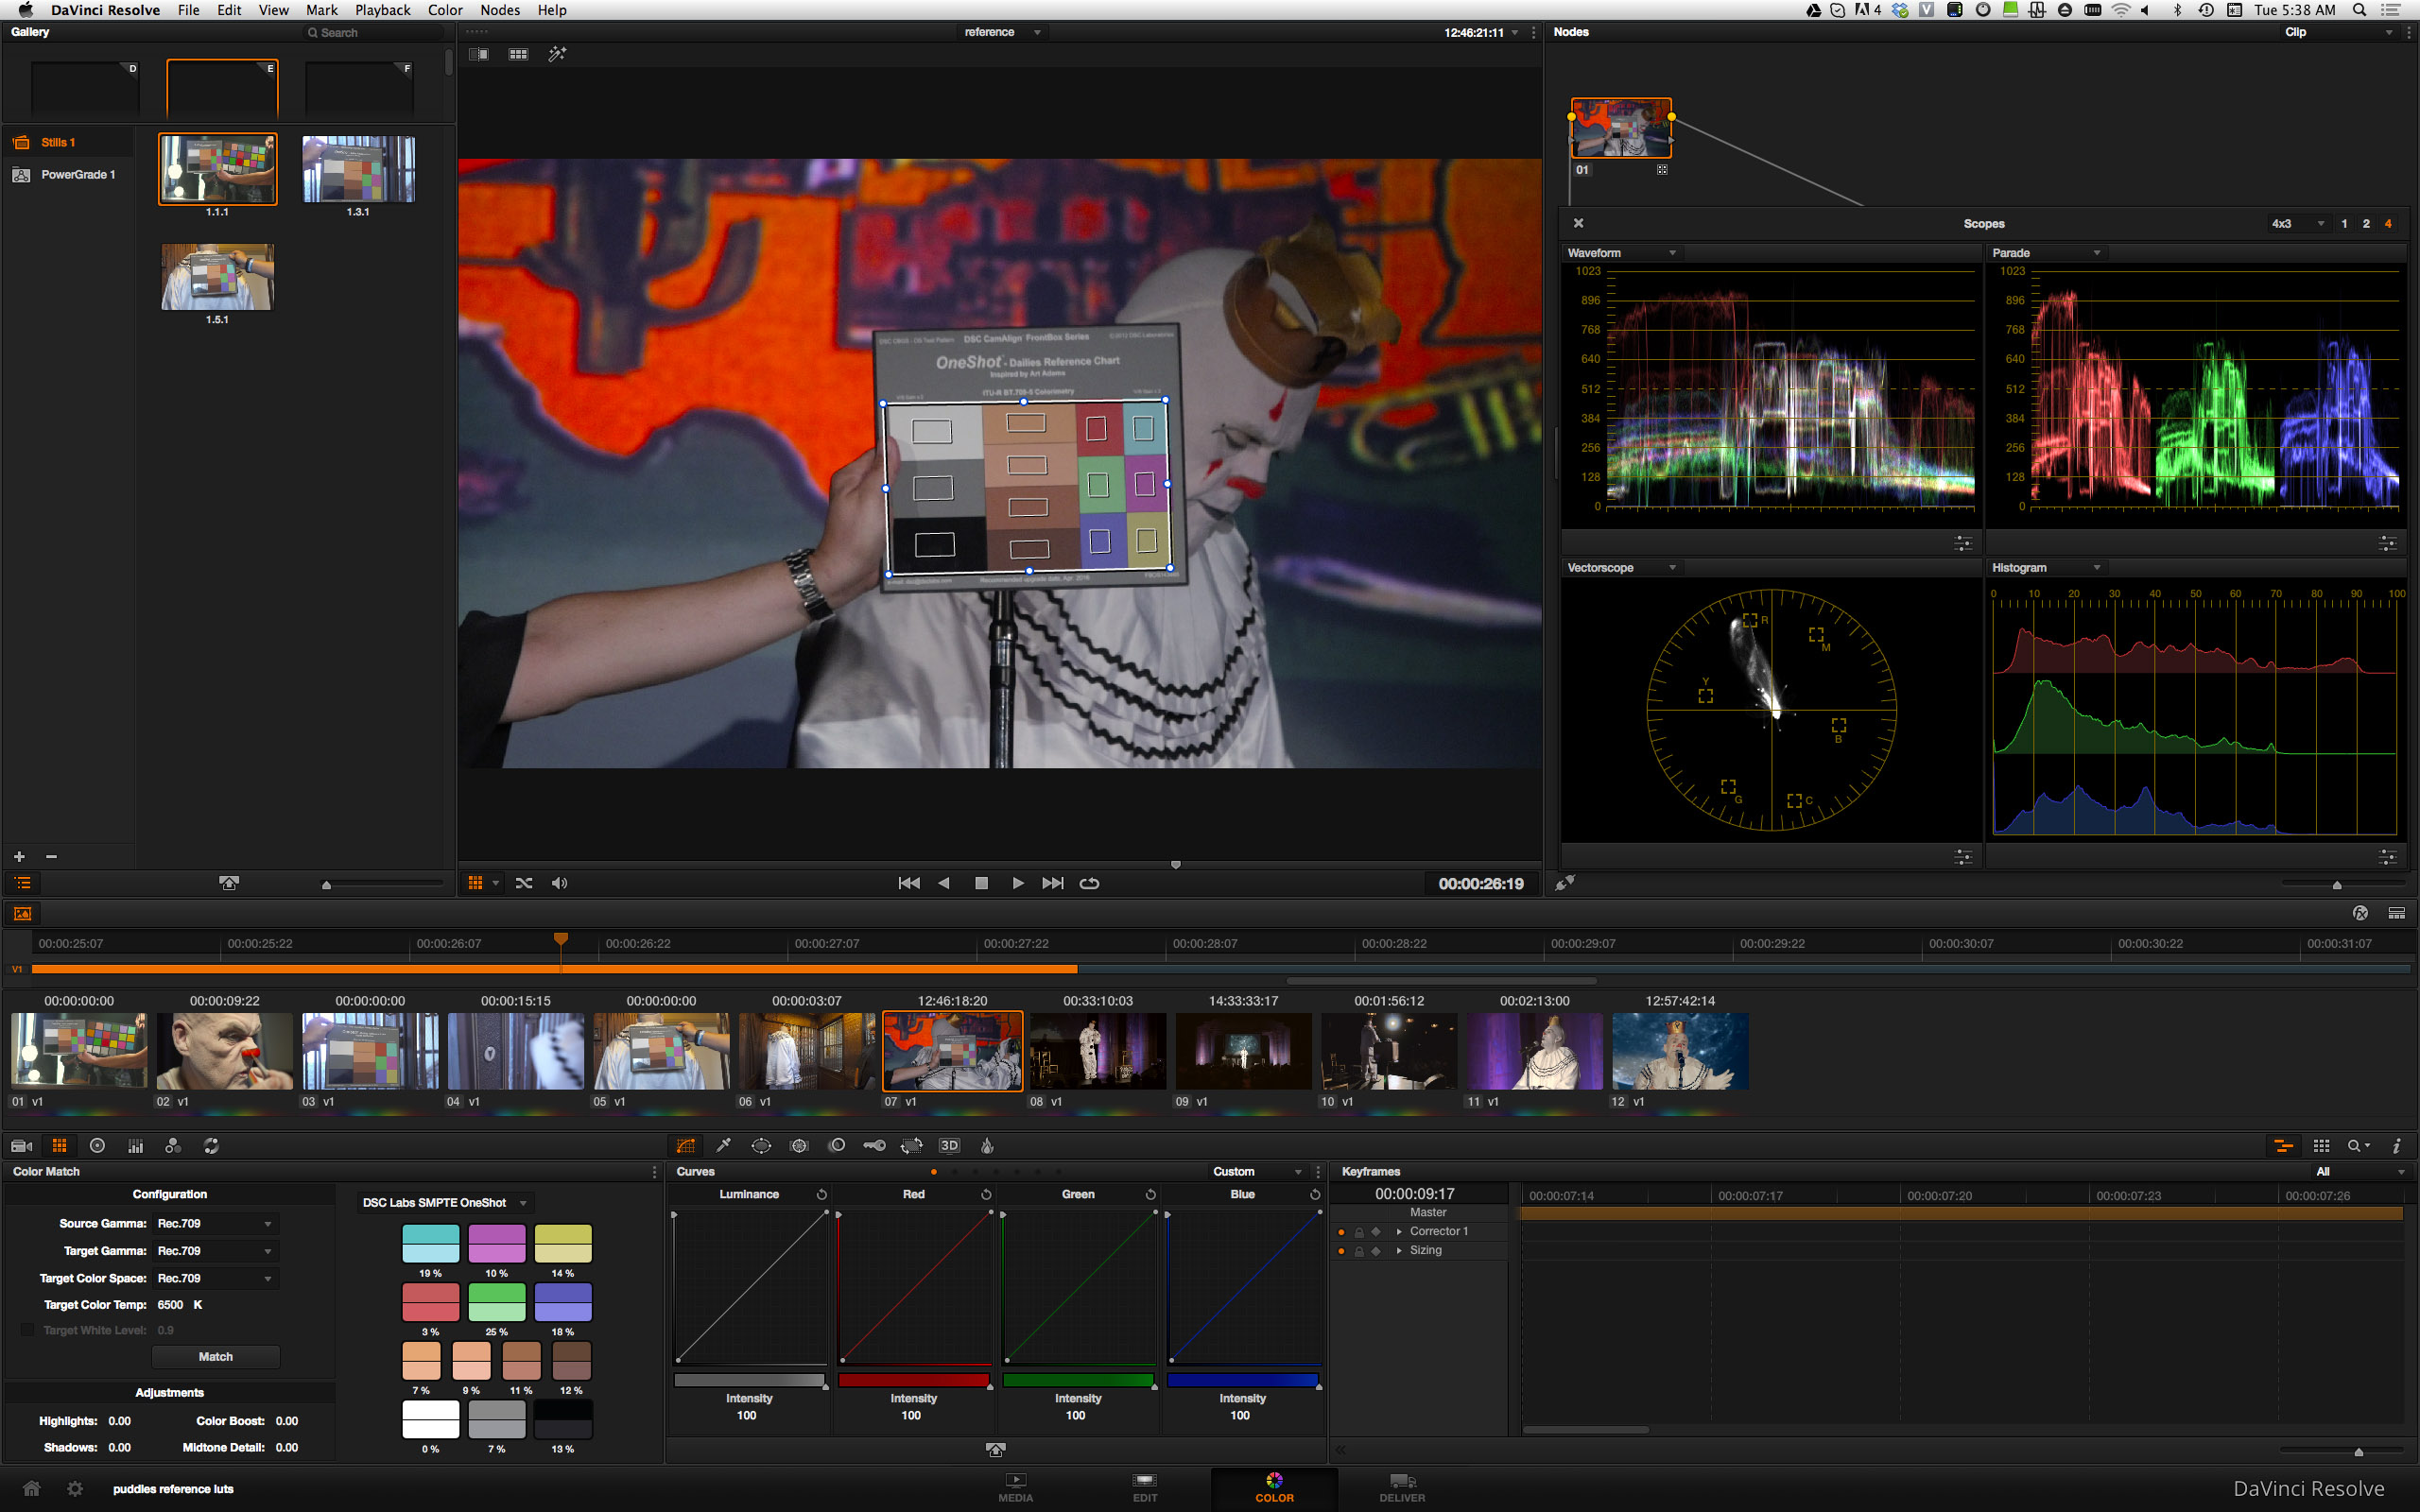
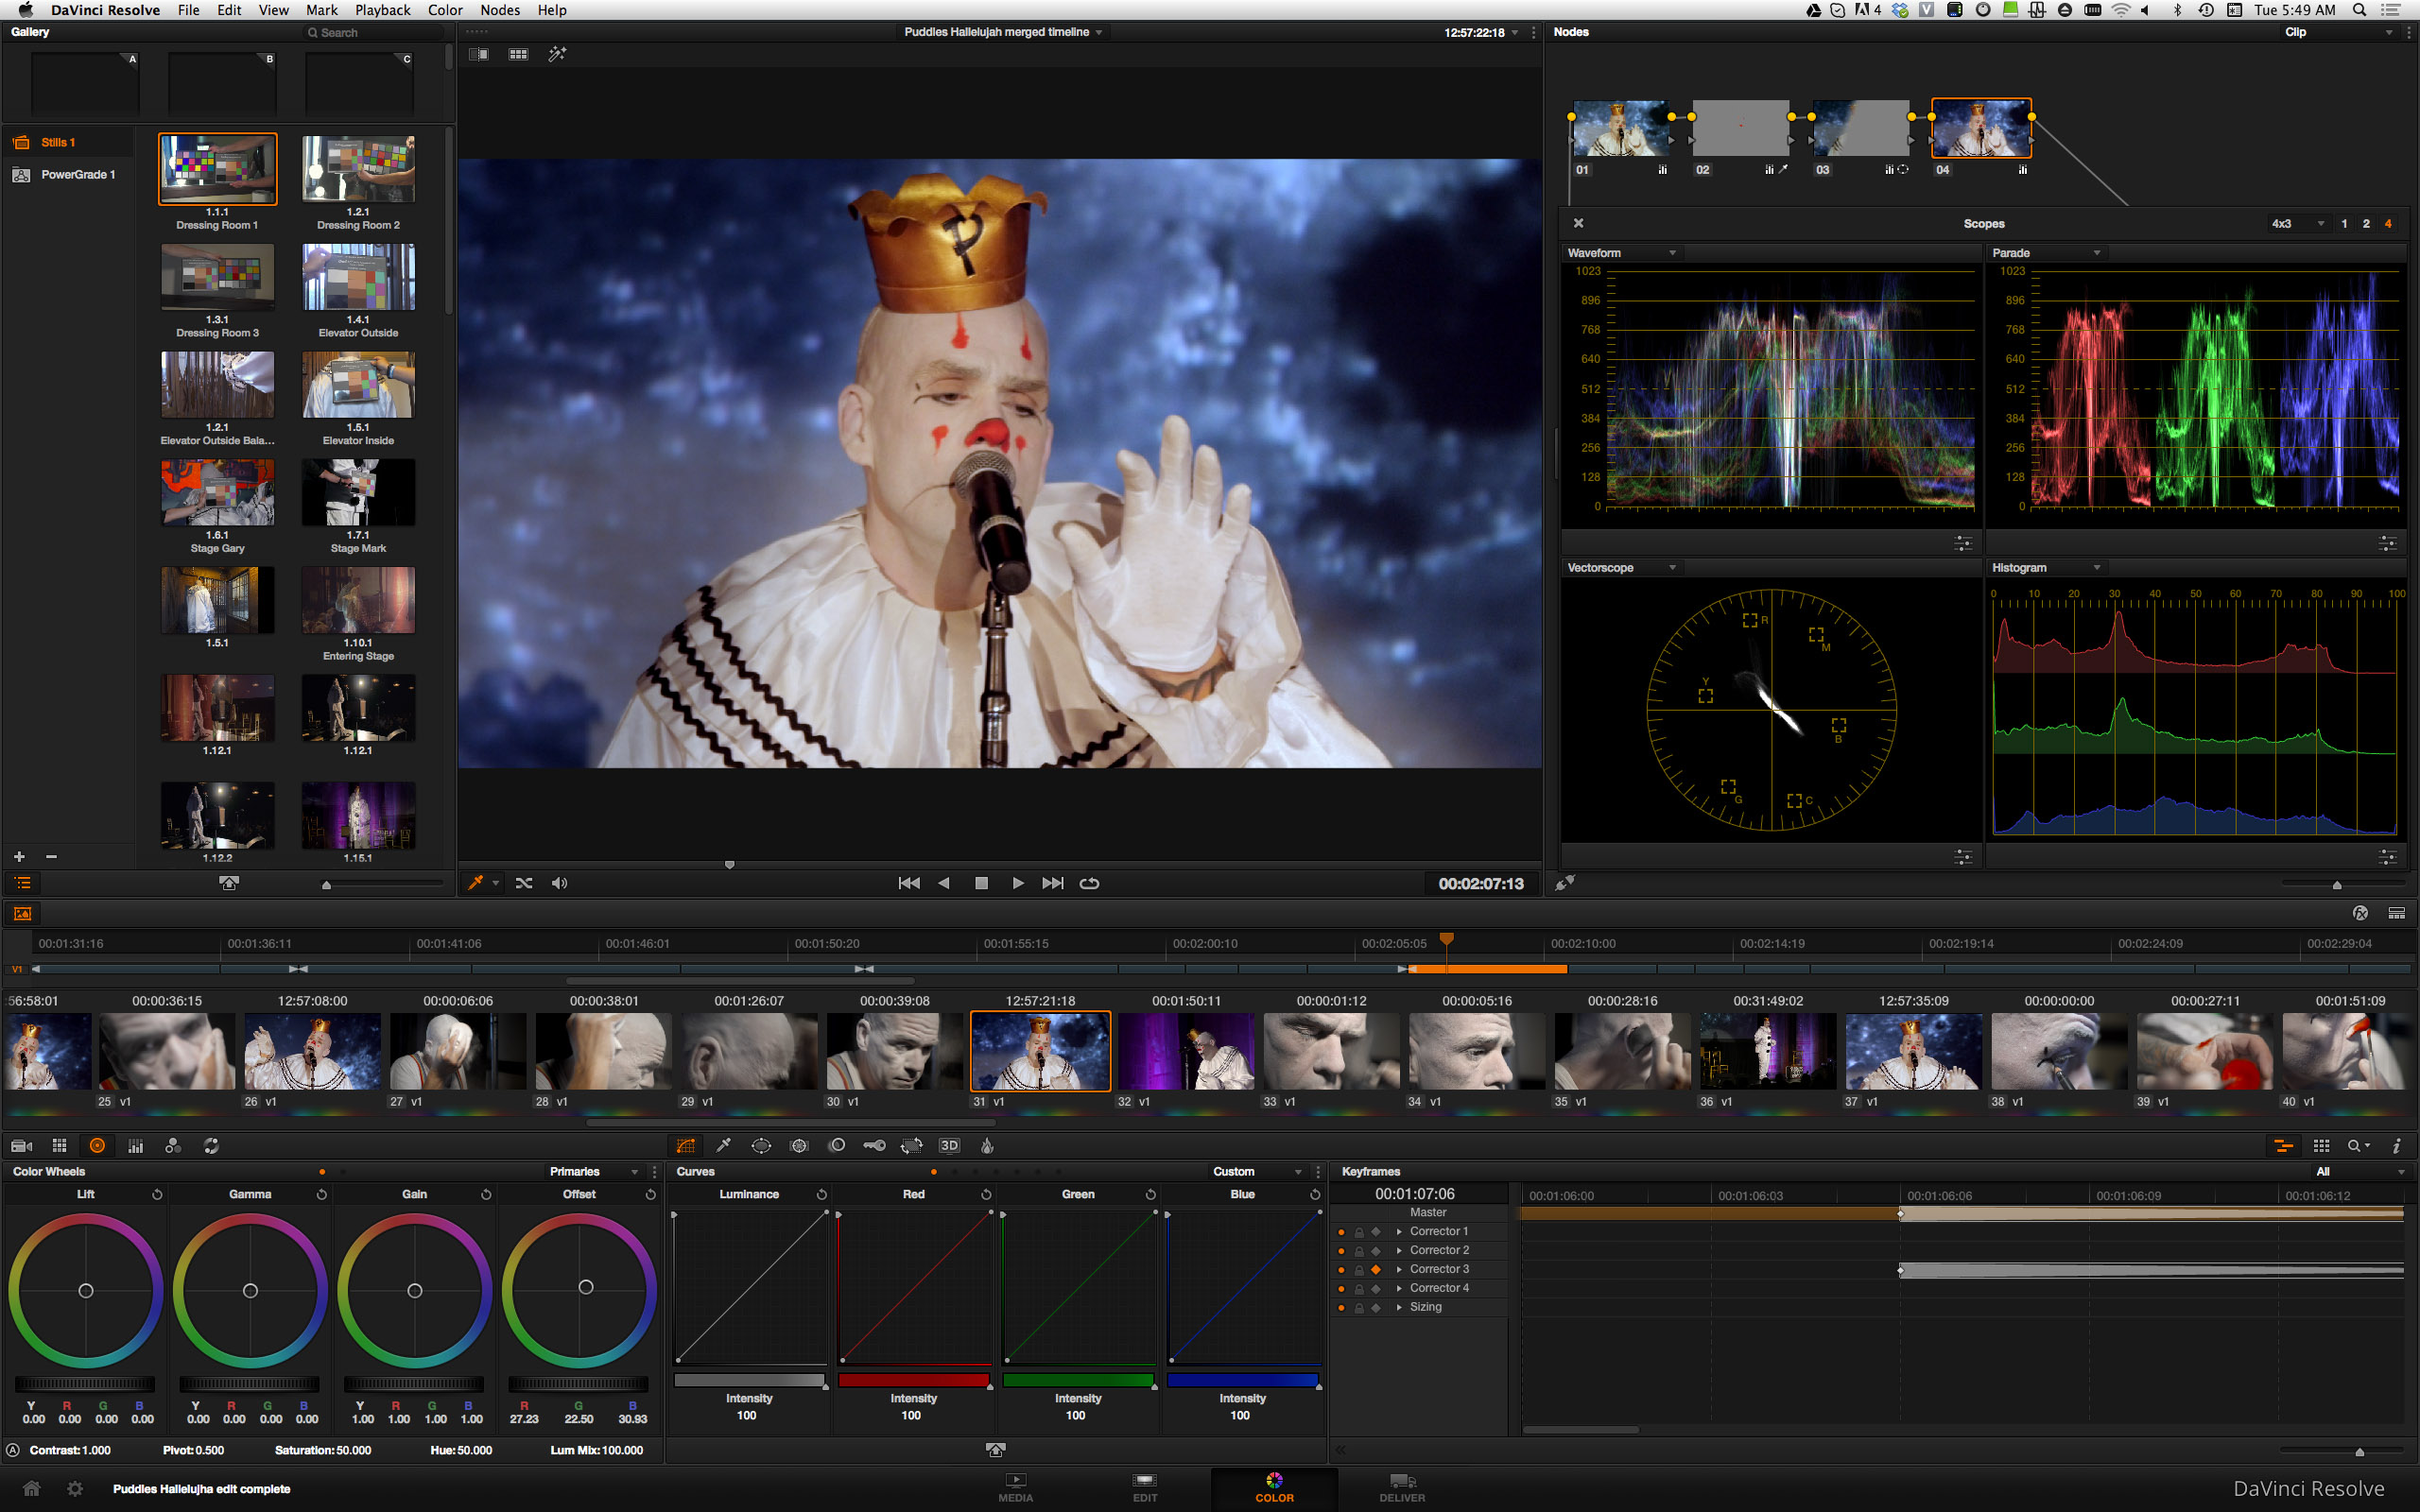
The big question for me was how to match these four different sensors so that the final piece would have strong visual continuity. I had recently read a great article by Michael Garber about using the DSC Labs One Shot color chart with the Davinci Resolve Lite grading software that was already my favorite color finishing tool. In the article, Michael describes how to bring each camera’s footage into Resolve version 11 and apply their new “color match” control to the DSC Labs target. This is what that looks like in the Resolve UI:
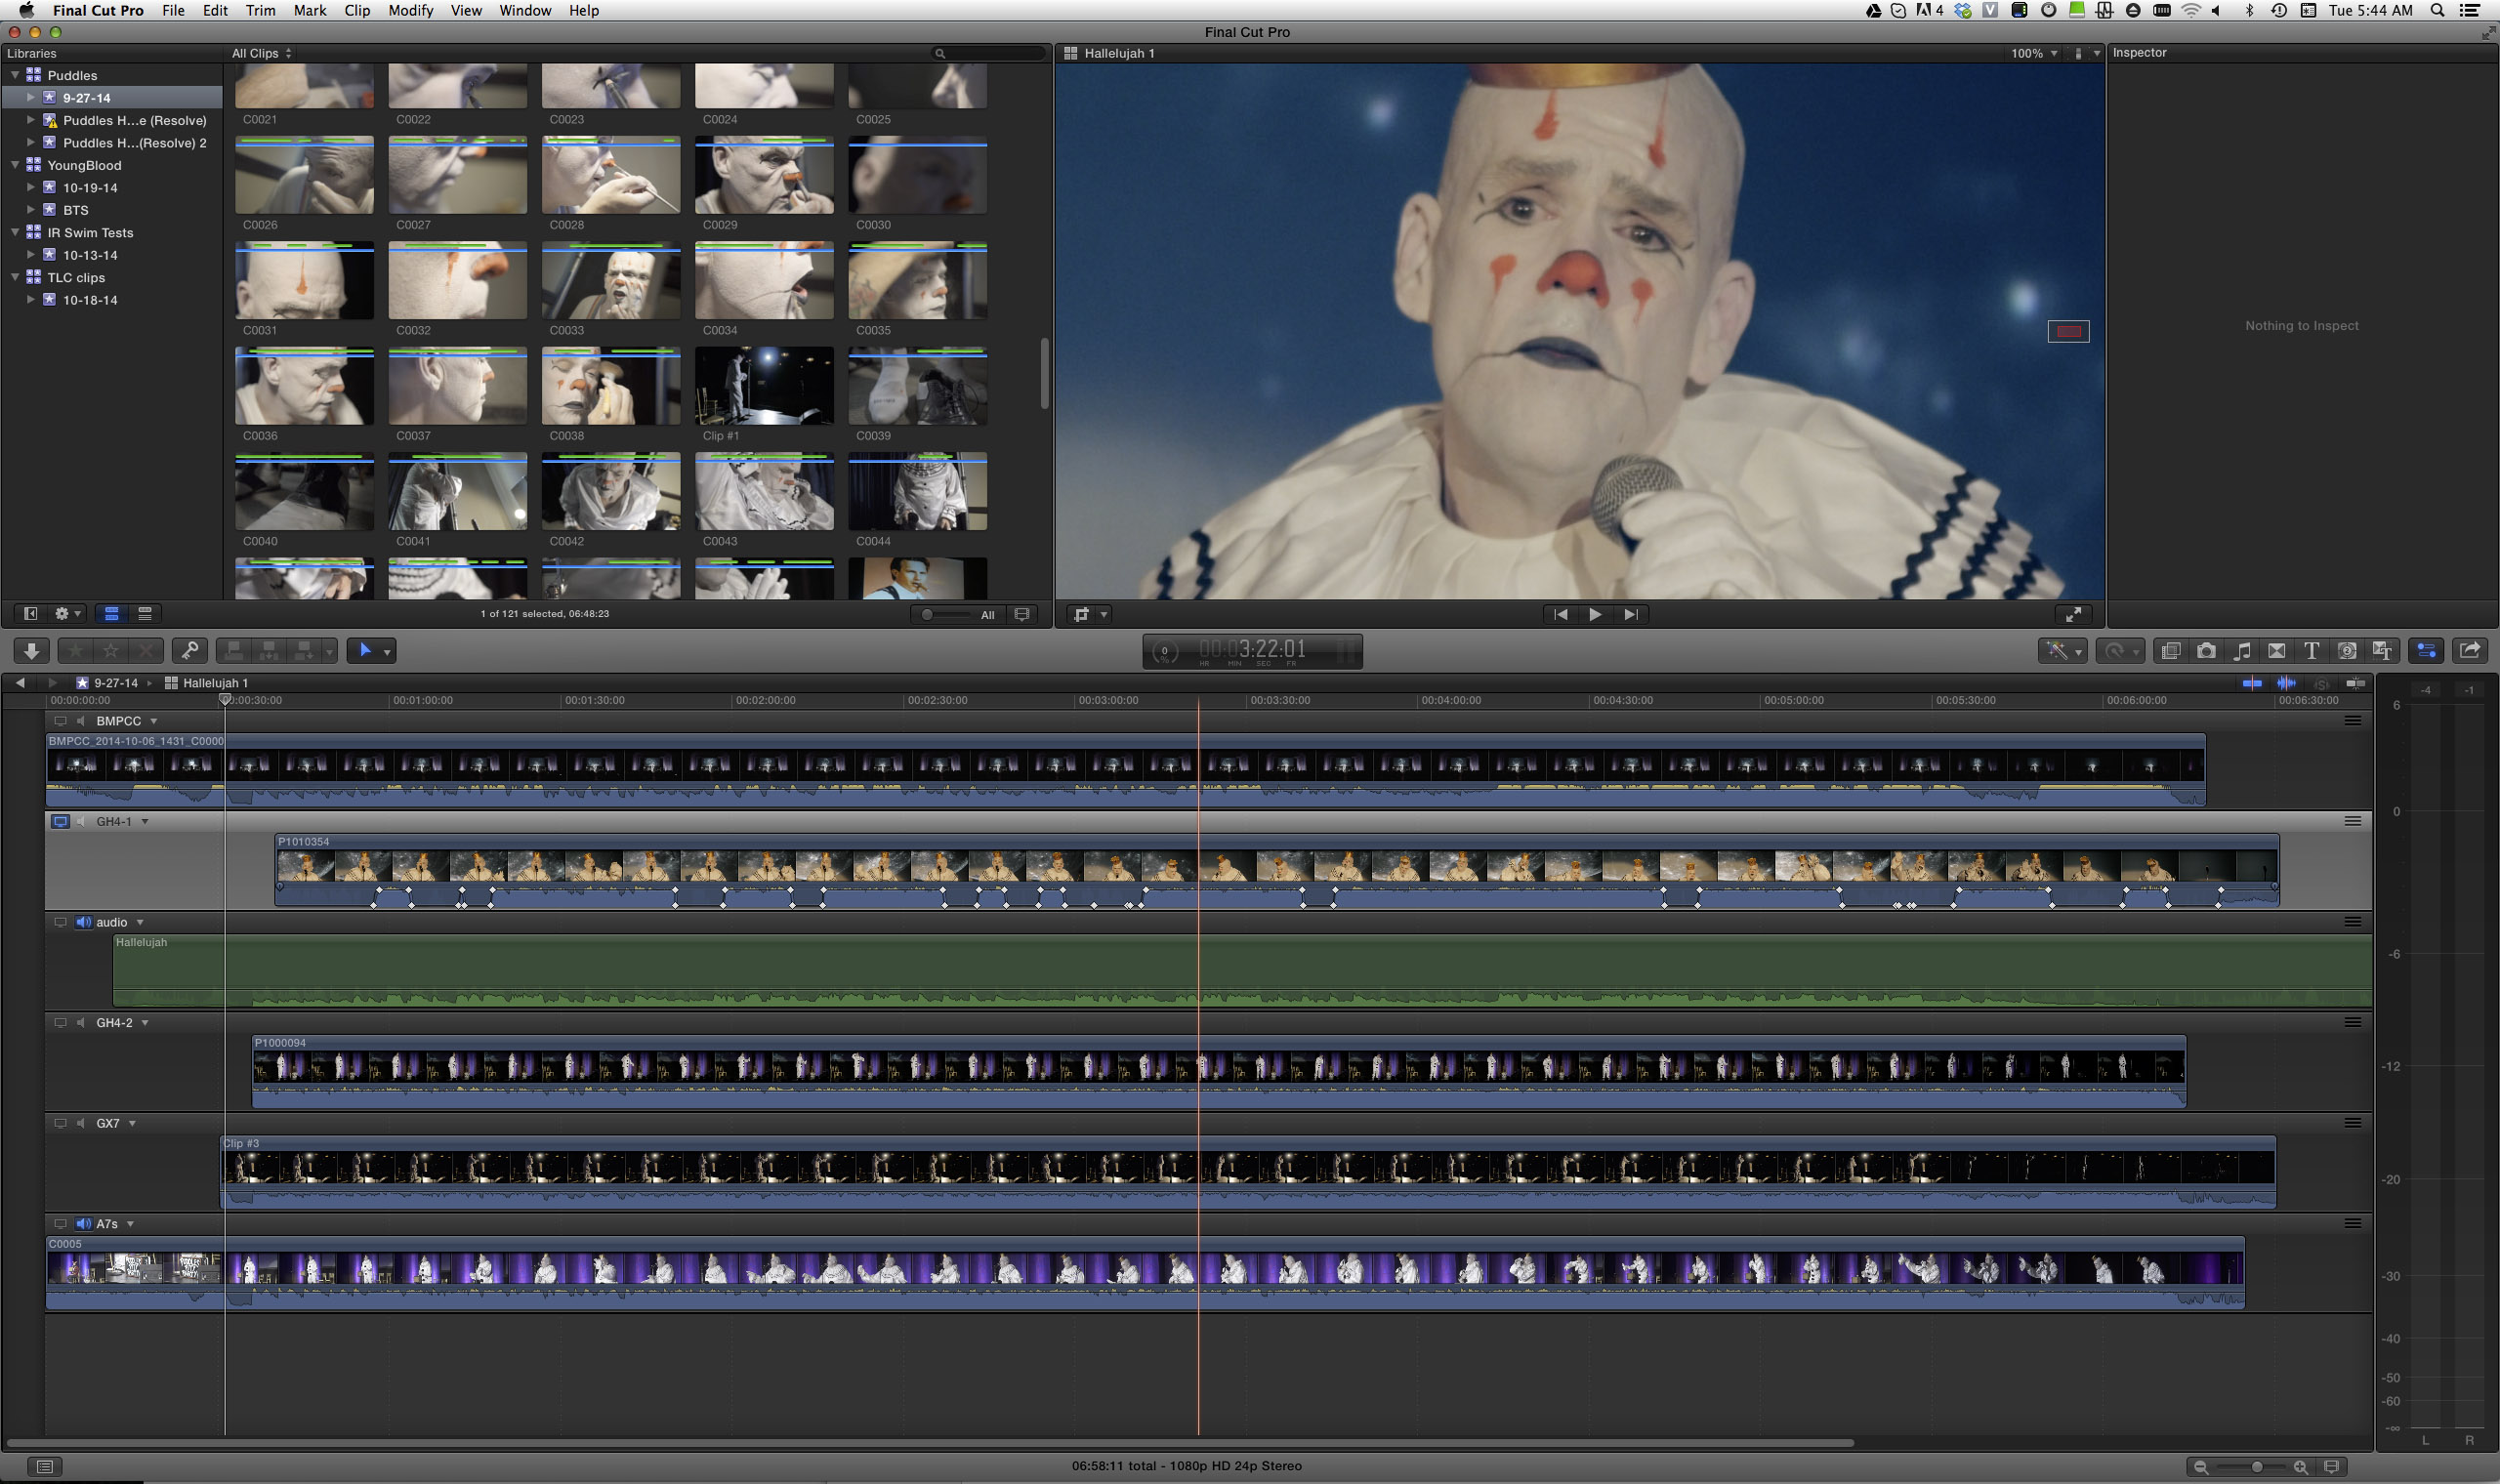
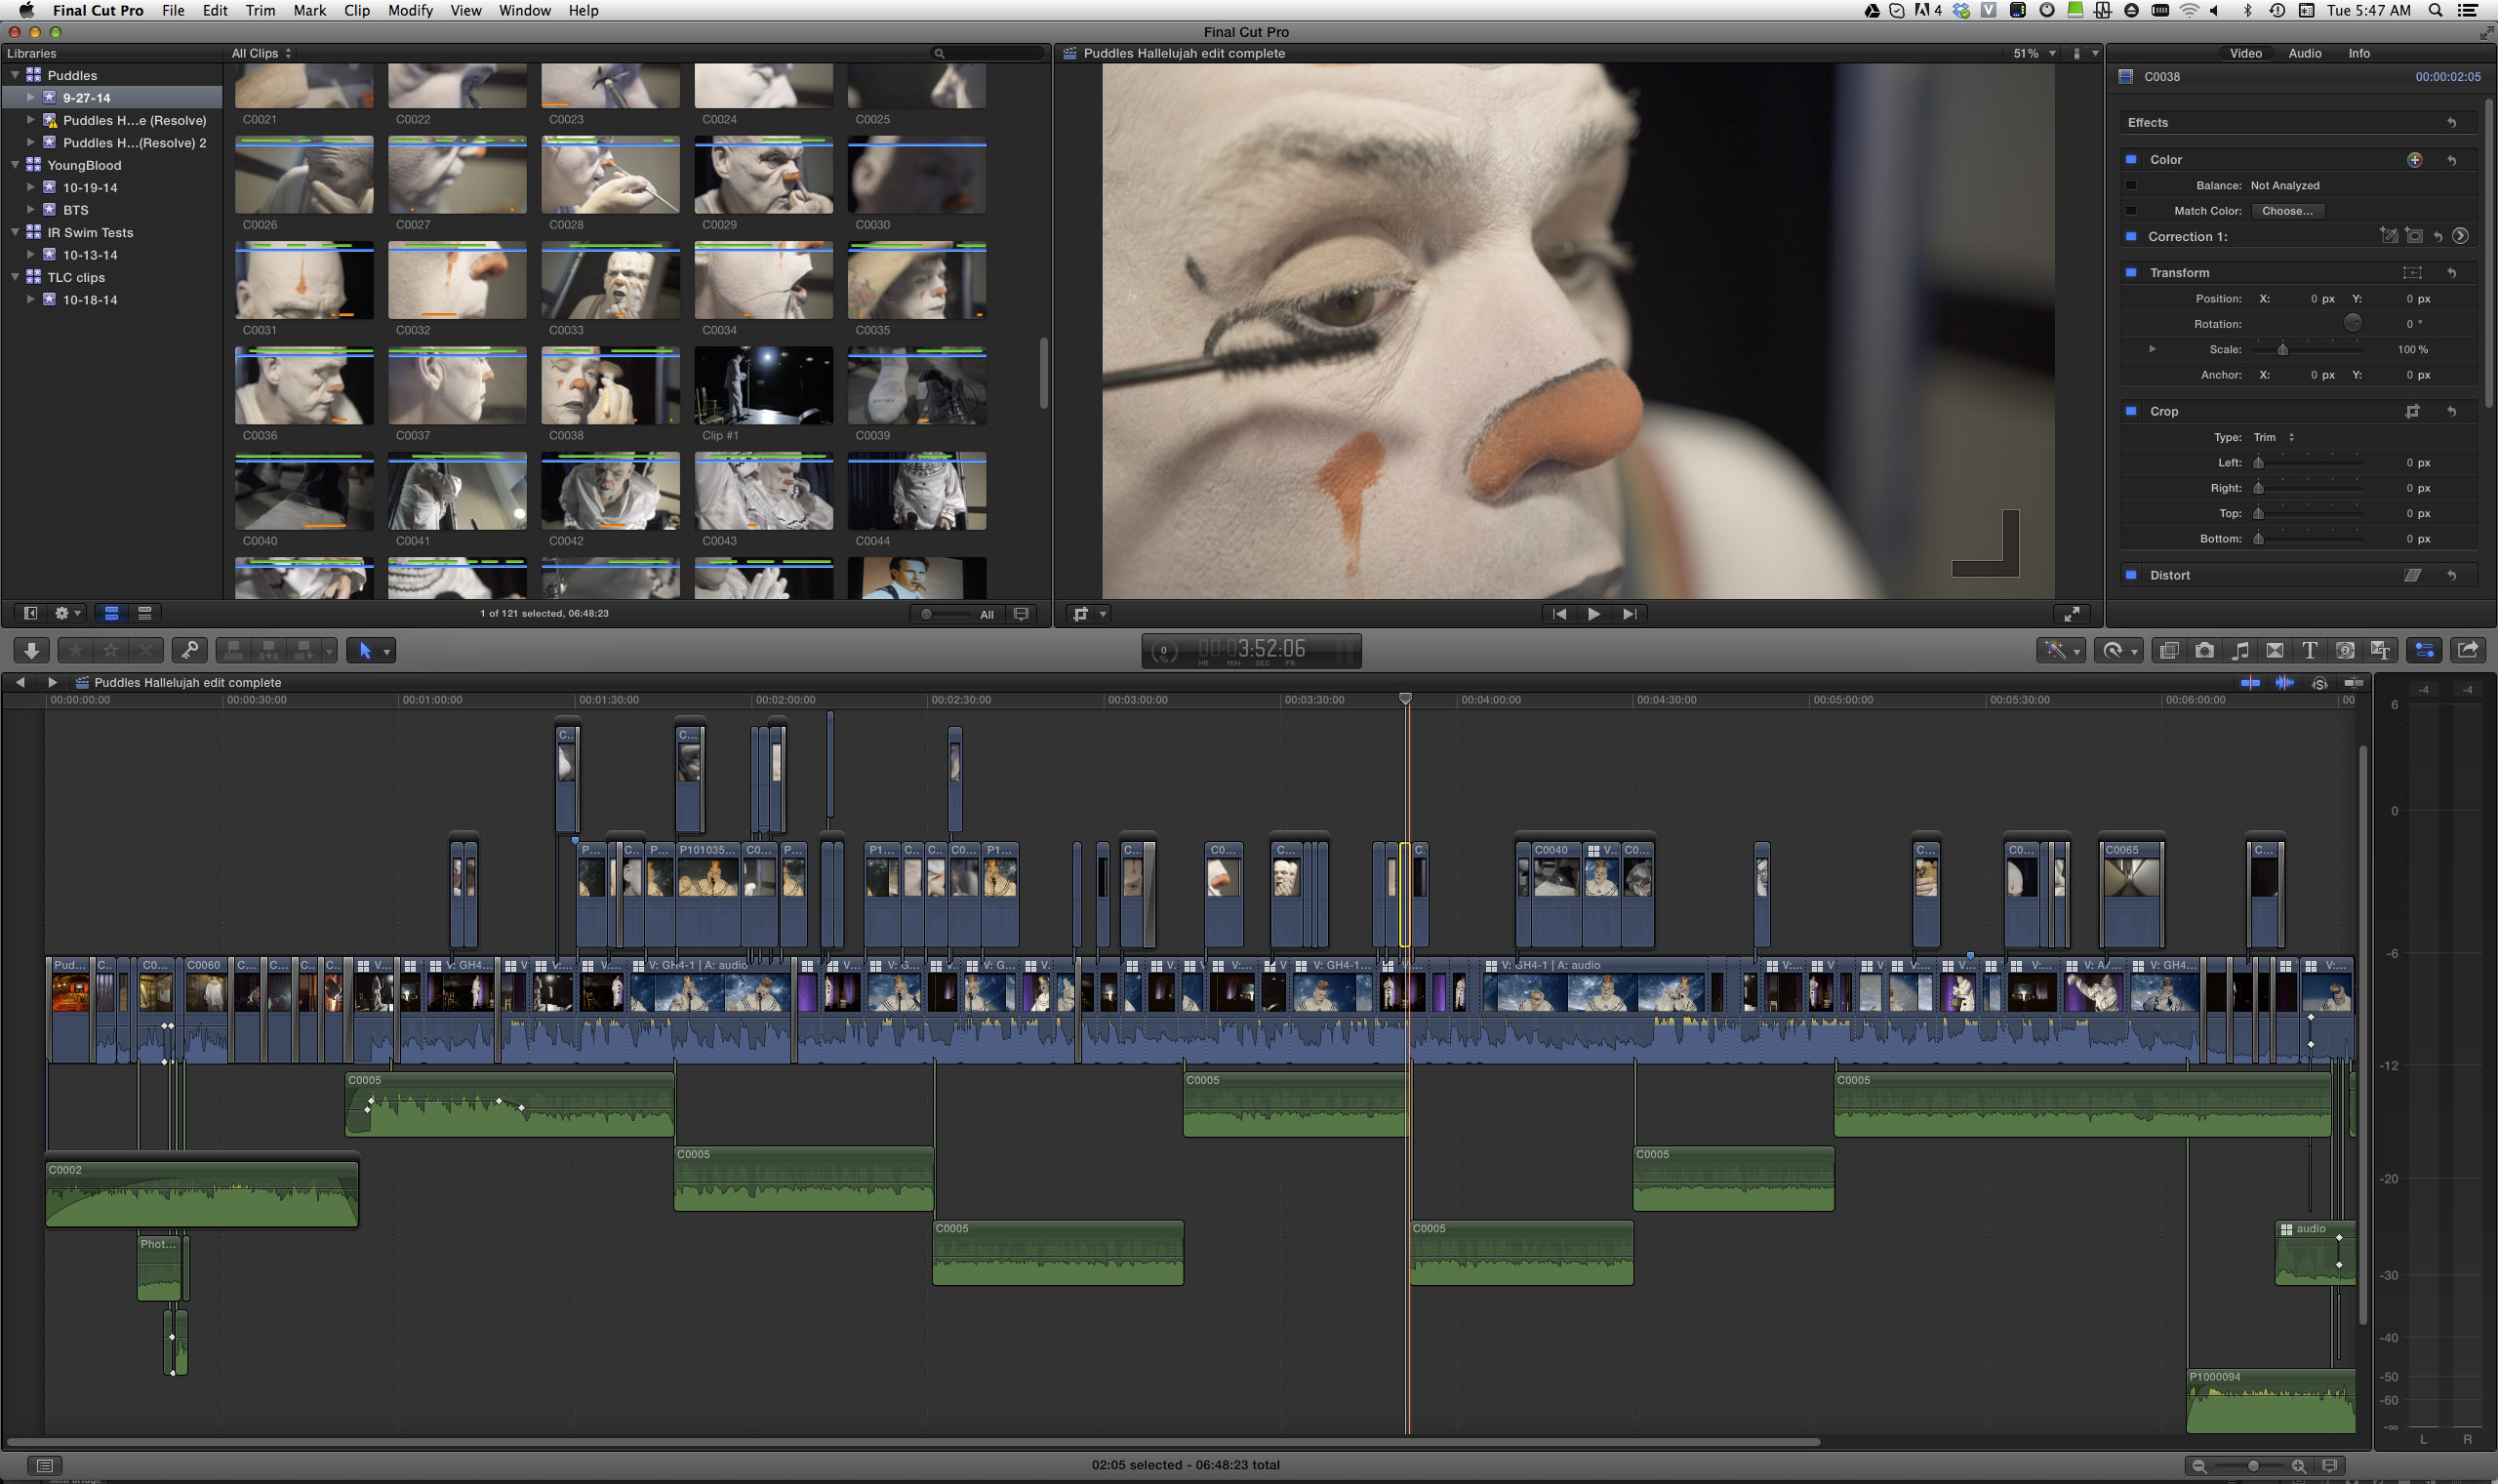
Once matched, with a right-click you can save the color LookUp Table (LUT) and then, using the $29 Final Cut Pro X LUT Utility from Color Grading Central, those LUTs can be applied to the video clip in FCPX. I did this with each of the five cameras we used on the shoot and voila… my multicam clip had five matched cameras even before I started editing! This allowed me to edit the piece with good visual continuity well before I started the final color grading process. Here’s what the multicam clip looks like in FCPX:
Editing among five cameras along with b-roll from the dressing room preparations for the show was easy and straightforward. All of the b-roll was cut into the timeline as connected clips.
Once I was completely satisfied with the edit, I deleted the LUTs from the five master clips and then used the Overwrite to Primary Storyline function to put the entire show into one storyline before exporting it as an fcpxml file for Davinci Resolve. This provided the cleanest way of getting a single timeline into Resolve.
I then reapplied the LUTs to the clips in Resolve and added secondary qualifiers to tweak various aspects of Puddles’ makeup, along with animated custom vignettes to direct the viewers’ eye to exactly where in the frame I wanted them to be looking. The color grading process in Resolve is incredibly fun and creative and I always look forward to getting to this stage. (I still can’t believe that Black Magic Design gives this software away for free.) I consider Resolve to essentially be Photoshop for video and would never finish a project without it. One of my favorite Resolve features is the ability to animate any aspect of the grading process, but most importantly it also provides the ability to grade clips in context with any other set of clips simultaneously, allowing for the type of visual continuity that defines a professionally-finished production.
I hope you enjoy the final piece. I had a terrific time shooting, editing and grading it. The Huffington Post feature on it drove over 250,000 people to watch it on Youtube, and that is always satisfying.
Bio: Gary Yost is a filmmaker and photographer living in the San Francisco Bay Area who focuses on telling stories about the interesting people and places where he lives. Yost has been using technology to tell complex stories for a long time. As the leader of the team that created Autodesk 3DS Max he gave millions of people 3D modeling and animation tools, enabling them to use computers to visualize anything they could think of… and a lot of those things were too large, too small, too fast or too slow to show with conventional video. These days, Yost refers to nature as “his grand animation stand” and spends much of his time on Mt. Tamalpais in Marin County. You can view his work at www.garyyost.com